When you create a company in Tally.ERP 9, the key features required to start recording your business transactions are set by default. As per your business requirements - such as inventory management, tax-based invoicing, payroll management, audit and security management - you can set your preferences using the Company Features .
Maintain your books of accounts : The key features required to get started with your bookkeeping needs are enabled as you create your company in Tally.ERP 9. You can further set your preferences for the company based on your business practices. If you want to manage your inventory, track your outstandings, use banking options to manage cheques and modes of payment, or use payroll for your profit centres, Tally.ERP 9 helps with all such business preferences and many more.
Manage your stock/inventory : If you are using inventory in your business, Tally.ERP 9 also helps you set up your inventory-related preferences. Starting with storage and classification of inventory to managing your sales, purchases, pricing of stocks, and even orders, you can enable the inventory options as needed.
Set up statutory : Businesses that need to comply with statutory requirements can set up their tax details for invoicing purpose. With Tally.ERP 9, you can define details for GST, VAT, Excise, Service Tax, TDS or TCS, as applicable to your business. All invoices that you create will continue to refer to the statutory details you define here.
Tally Software Services (TSS) and Audit : If you have enabled security settings for your company and subscribed to TSS for receiving updates from Tally, you can predefine your contact details required to receive communications about TSS. You can also set your preferences for some of the key features, such as Tally.NET, Synchronisation, and so on.
Businesses opting for statutory audit can preset the company in Tally.ERP 9 for audit priorities and categories. Refer to the Audit topic.
Add-ons : Customised business needs are also accommodated in Tally.ERP 9. You can use the TallyShop feature to purchase available add-ons as per your business needs.
On this page
● Accounting Features
● Inventory Features
● Statutory and Taxation
● TSS Features
● Audit Features
● Add-Ons
Maintain Your Books of Accounts | Accounting Features
The key features required to get started with your bookkeeping needs are enabled as you create your company in Tally.ERP 9. You can further set your preferences for the company based on your business practices. If you want to manage your inventory, track your outstandings, use banking options to manage cheques and modes of payment, or use payroll for profit centres, Tally.ERP 9 helps with all such business preferences and many more.
Press F11 (Features) > F1 (Accounts).
Note: If inventory vouchers and features are not appearing for your company, set the option Maintain accounts only to No , to use the Inventory features.
In this section
● General
● Outstanding Management
● Cost/Profit Centres Management
● Invoicing
● Budgets and Scenario Management
● Banking Features
● Other features
General
Option |
Functionality |
Additional Information |
Maintain accounts only? |
Enable this option if you do not want to maintain any inventory. |
|
Integrate accounts and inventory? |
Enable this option to maintain your stock or inventory along with your books of accounts. |
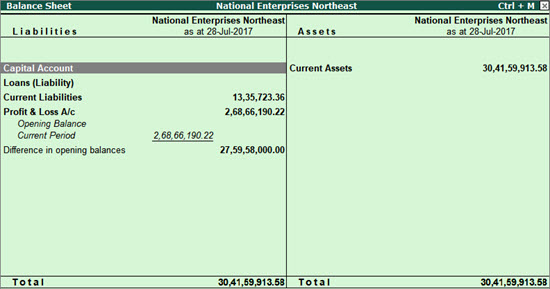
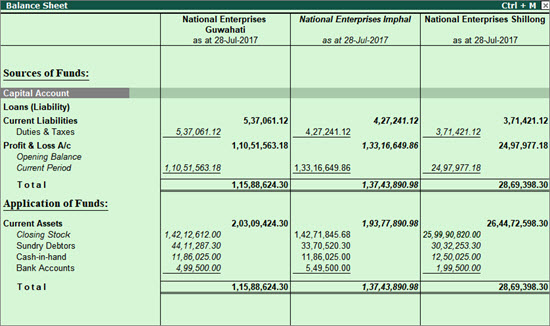
Stock records may contain errors caused by wrong allocation to items. This feature enables finalization of financial books without waiting for the reconciliation of stocks. You can drill down from the Balance Sheet to view the Stock Register. |
Use Income and Expenses A/c instead of Profit and Loss A/c? |
Enable this option to display Income and Expenses A/c as the menu item instead of Profit and Loss A/c in Gateway of Tally . |
Income and expenses statements are generally used for non-trading accounts and profit and loss a/c are used for trading accounts. |
Enable multi-currency |
Enable this option to allow working with multiple currencies - especially when you have parties transacting with you in currencies other than the base currency set for your company. |
|
Outstanding Management
Option |
Functionality |
Additional Information |
Maintain bill-wise details? |
Enable this option to display the option Maintain balances bill by bill created under sundry debtors and creditors. When you enter details of sales and purchases with the bill-wise option activated, Tally.ERP 9 prompts you to identify the invoice with an appropriate reference number. |
The reference number can then be used to allocate payments to the correct invoice to maintain an accurate account of outstanding. Bill-wise details for non-trading accounts is useful when one needs to track either an installment to be paid or a loan amount to be received over a certain period of time. |
Activate interest calculation? |
Enable this option to calculate interest automatically based on the interest rate and the style of calculation specified. |
This is useful when interest rates change from time to time. |
Cost/Profit Centres Management
Option |
Functionality |
Maintain payroll? |
Enable this option to maintain payroll information in Tally.ERP 9 for the selected company. |
Maintain cost centres? |
Enable this option to maintain and allocate expenses to cost centres. |
Use cost center for job costing? |
Enable this option to track all income and expenses. |
Maintain more than one payroll or cost category? |
Enable this option to create more than one Payroll or Cost Category. |
Use pre-defined cost centre allocations in transactions? |
Enable this option to define Cost Centre Allocations. |
Show opening balance for revenue items in reports? |
Enable this option to display the opening balance in Cost Centre report for the cost centres which are allocated to the ledgers, grouped under Income and Expenses Group. |
Invoicing
Option |
Functionality |
Enable invoicing? |
Enable this option to create Sales and Purchase vouchers in the invoice format. |
Record purchases in invoice mode? |
Enable this option to enable voucher class option in the purchase voucher type. |
Use debit and credit notes? |
Enable this option to use the debit note and credit note voucher types. |
Record credit notes in invoice mode? |
Enable this option to create credit notes in invoice mode. |
Record debit notes in invoice mode? |
Enable this option to create debit notes in invoice mode. |
Budgets and Scenario Management
Option |
Functionality |
Maintain budgets and controls? |
Enable this option to create multiple budgets. The Budgets menu option is displayed in Gateway of Tally > Masters Info. > Accounts Info. . |
Use reversing journals and optional vouchers? |
Enable this option to display the Scenario option in Accounts Info. menu . You can create and alter scenarios. You can record a Reversing Journal and make it Optional so that the entries do not affect the books. |
Banking Features
Option |
Functionality |
Enable cheque printing? |
Enable this option to use cheque printing . |
Edit banking features? |
Enable this option to alter banking features. |
Set/alter post-dated transaction features? |
Enable this option to record post-dated transactions and view related reports. |
Other features under Accounting
Option |
Functionality |
Enable zero-valued transactions? |
Enable this option to allow zero-valued transactions in vouchers. |
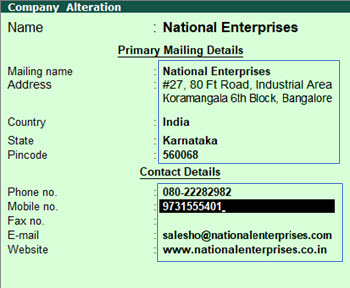
Maintain multiple mailing details for company and ledgers? |
Enable this option to maintain multiple mailing details for your company and ledgers . |
Set/alter company mailing details? |
Enable this option to create or alter Address Types . |
Enable company logo? |
Enable this option to print the company logo on the selected vouchers, reports, and invoices. Specify the path of the logo image file in the Location of logo field . For example, C:\Tally.ERP9\CompLogo.bmp. The company logo is printed on the top left of the respective voucher, report, or invoice. It is mandatory to save the logo as Bitmap or JPEG image file. Ensure that the extension .bmp or .jpg is specified while providing the location of logo. The recommended size for logo image is 96 x 80 (Width x Height) pixels . |
Manage Your Stock | Inventory Features
If your business includes selling or purchasing of stock items or storing the stock items for manufacturing or job works, Tally.ERP 9 also takes care of your inventory-related preferences. Starting with storage and classification of inventory to managing your sales, purchases, and even orders, you can enable inventory options for all such needs.
Press F11 (Features) > F2 (Inventory).
In this section
● General
● Storage and Classification
● Order Processing
● Invoicing
● Purchase Management
● Sales Management
● Other Features
General
Option |
Functionality |
Additional Information |
Integrate accounts and inventory? |
Enable this option to maintain your stock or inventory along with your books of accounts. |
Stock records may contain errors caused by wrong allocation to items. This feature enables finalization of financial books without waiting for the reconciliation of stocks. You can drill down from the Balance Sheet to view the Stock Register. |
Enable zero-valued transactions? |
Enable this option to allow zero-valued transactions in the Inventory vouchers. |
|
Storage and Classification
Option |
Functionality |
Maintain multiple Godowns / Excise Units? |
Enable this option if you have more than one stock storage locations or godowns, and you want to track stock movement across these locations. |
Maintain stock categories? |
Enable this option to create and maintain stock categories. |
Maintain batch-wise details? |
Enable this option to maintain batch information pertaining to Stock Items. Setting this option to Yes displays the Maintain in Batches field in the Stock Item Creation screen. |
Set expiry dates for batches? |
Enable this option to set expiry dates for the batches. This displays an additional field Use Expiry Dates in the Stock Item Creation screen. |
Use separate actual and billed quantity columns? |
Enable this option to specify quantities that are different from those delivered/received when invoicing. |
Order Processing
Option |
Functionality |
Enable purchase order processing ? |
Enable this option to create purchase orders. This feature can also be used for pre-closure of purchase order. |
Enable sales order processing ? |
Enable this option to create sales orders. |
Enable job order processing? |
Enable this option to create Job Work Out or Job Work In orders. |
Invoicing
Option |
Functionality |
Enable invoicing? |
Enable this option to create Sales and Purchase vouchers in the invoice format. |
Record purchases in invoice mode? |
Enable this option to use the voucher class option in the purchase voucher type. |
Use debit and credit notes? |
Enable this option to use the debit note and credit note voucher types. |
Record credit notes in invoice mode? |
Enable this option to create credit notes in invoice mode. |
Record debit notes in invoice mode? |
Enable this option to create debit notes in invoice mode. |
Purchase Management
Option |
Functionality |
Track additional costs of purchase? |
Enable this option to obtain a break-up of purchase costs, without the need to separately debit ledger accounts for expenses. |
Sales Management
Option |
Functionality |
Use multiple price levels? |
Enable this option to create multiple price levels. |
Other features under Inventory
Option |
Functionality |
Use tracking numbers (enables delivery and receipt notes)? |
Enable this option to use tracking numbers to maintain the relation between delivery notes and invoices. This is available for both purchases and sales. |
Use rejection inward and outward notes? |
Enable this option to record rejection of goods separately and not through a common debit note or credit note. |
Use material in and out vouchers? |
Enable this option to record transfer of item quantity towards the party and transfer material from one Godown/Location to the other. |
Use cost tracking for stock item? |
Enable this option to analyse the cost involved for an item. |
Set Up Statutory and Taxation
As per the Department, if your business falls under a particular tax, you can enable the tax type for your company. In Tally.ERP 9, you can set up the statutory details for the company - specify details for GST, VAT, Excise, Service Tax, TDS ad TCS. All invoices you create will continue to refer to the statutory details you specify here.
Press F11 (Features) > F3 (Statutory).
Option |
Functionality |
Enable Goods and Services Tax (GST)?Set/alter GST details? |
If your business is under the GST regime, you can enable these options and specify the GST details for your company. Next time you press F11 (Feature), the Set/alter GST details option is defaulted to No . This is to help avoid opening the GST Details screen again, unless you have to make any changes. To make any updates, enable the Set/alter GST details . |
Enable Value Added Tax (VAT)?Set/alter VAT details? |
If your business is under the VAT regime, you can enable these options and specify the VAT details for your company. |
Enable excise?Set/alter excise details? |
Enable these options to allow considering excise-related details during voucher entry. |
Enable service tax?Set/alter service tax details? |
If you pay service tax as part of your business transaction, enable these options to specify the service tax details and set the preferences for your company. |
Enable Tax Deducted at Source (TDS)?Set/alter TDS details? |
If your businesses considers TDS payments, enable these options and specify the TDS deductor details along with the applicable Rates and Exemptions. |
Enable Tax Collected at Source (TCS)?Set/alter TCS details? |
If your businesses considers TCS payments, enable these options and specify the TCS collector details along with the applicable Rates and Exemptions. |
Set Up Tally Software Services (TSS) and Audit
Tally Software Services (TSS) is a set of capabilities that can meet certain customised requirements in a business. You can avail capabilities such as continuous improvements to the product, central consolidation of all branch office data over secure servers, remote connectivity, banking services, instant support from within Tally.ERP 9, and many more that enhance business performance. If you have availed TSS to receive updates from Tally, you can predefine your contact details and set your preferences for some of the key features, such as Tally.NET, Synchronisation, SME, and so on. For more information, refer to the TSS topic.
In this section
● TSS Features
● Tally Audit
TSS Features
Press F11 (Features) > F4 (TSS).
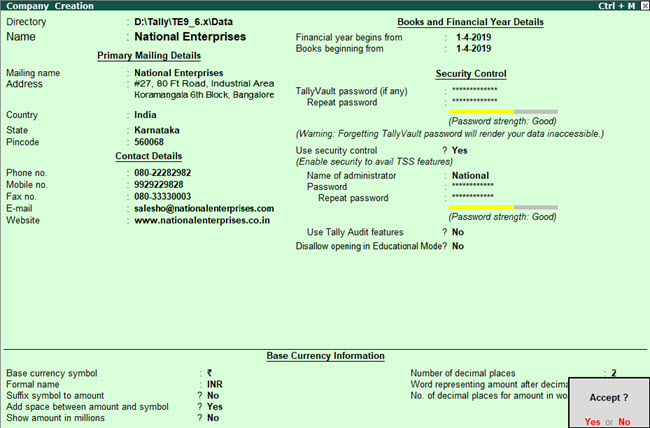
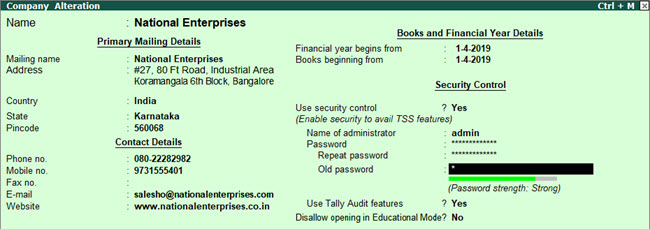
Before you could view the TSS features, ensure that you have enabled the security settings for your company.
1. Gateway of Tally > Alt + F3 (Cmp Info) > Alter .
2. Set Use security control to Yes .
3. Enter the required credentials and accept. As always, you can press Ctrl + A to save.
Option |
Functionality |
Additional Description |
Connection Details |
Enter these details based on how you want the company in Tally.ERP 9 to be recognised through connected services, like Remote Access, Data Synchronisation, and so on. |
The connect name entered here must be entered during client rule creation. |
Connectivity Features |
● Connect for broswer access : Once you company is connected to Tally.NET server, you can access the key business report from the broswer in any device using your Tally.NET credentials. ● Connect to Tally.NET Services : Enable this option to use features like Remote Access and Synchronisation. ● Connect company on loading : Enable this option to connect your company automatically once you load it. |
If you wish to avail connected services, you can connect your company to the Tally.NET server. |
SMS Access details |
With TSS subscription, you are eligible to receive updates through SMS. |
The company name in the SMS Company Name field should not exceed 8 characters. |
Audit Features
Press F11 (Features) > F5 (Audit).
Option |
Functionality |
Enable audit working paper |
Enable this option to allow the auditor to audit the working paper. The auditor should document matters which are important in providing evidence that the audit was carried out in accordance with the basic principles. Working Papers aid in the planning and performance; supervision and review; and provide evidence of the audit work performed to support the auditor’s opinion. |
Enable audit priorities and categories |
Enable this option to assign priorities and categories while seeking clarification from the users of the company. |
Shop for Add-Ons
TallyShop is a centralised location that has a host of generic add-ons (customised programs and extensions). Add-ons are developed by authorised Tally partners and available in TallyShop. Based on your customisation needs, you can access TallyShop, search for the required solution, download and use them by paying a nominal price or subscription charges.
● Press F11 (Features) > F6 (Add-Ons).
● Alternatively, press Ctrl + S (TallyShop) to open the TallyShop screen.